Master Admin Guide
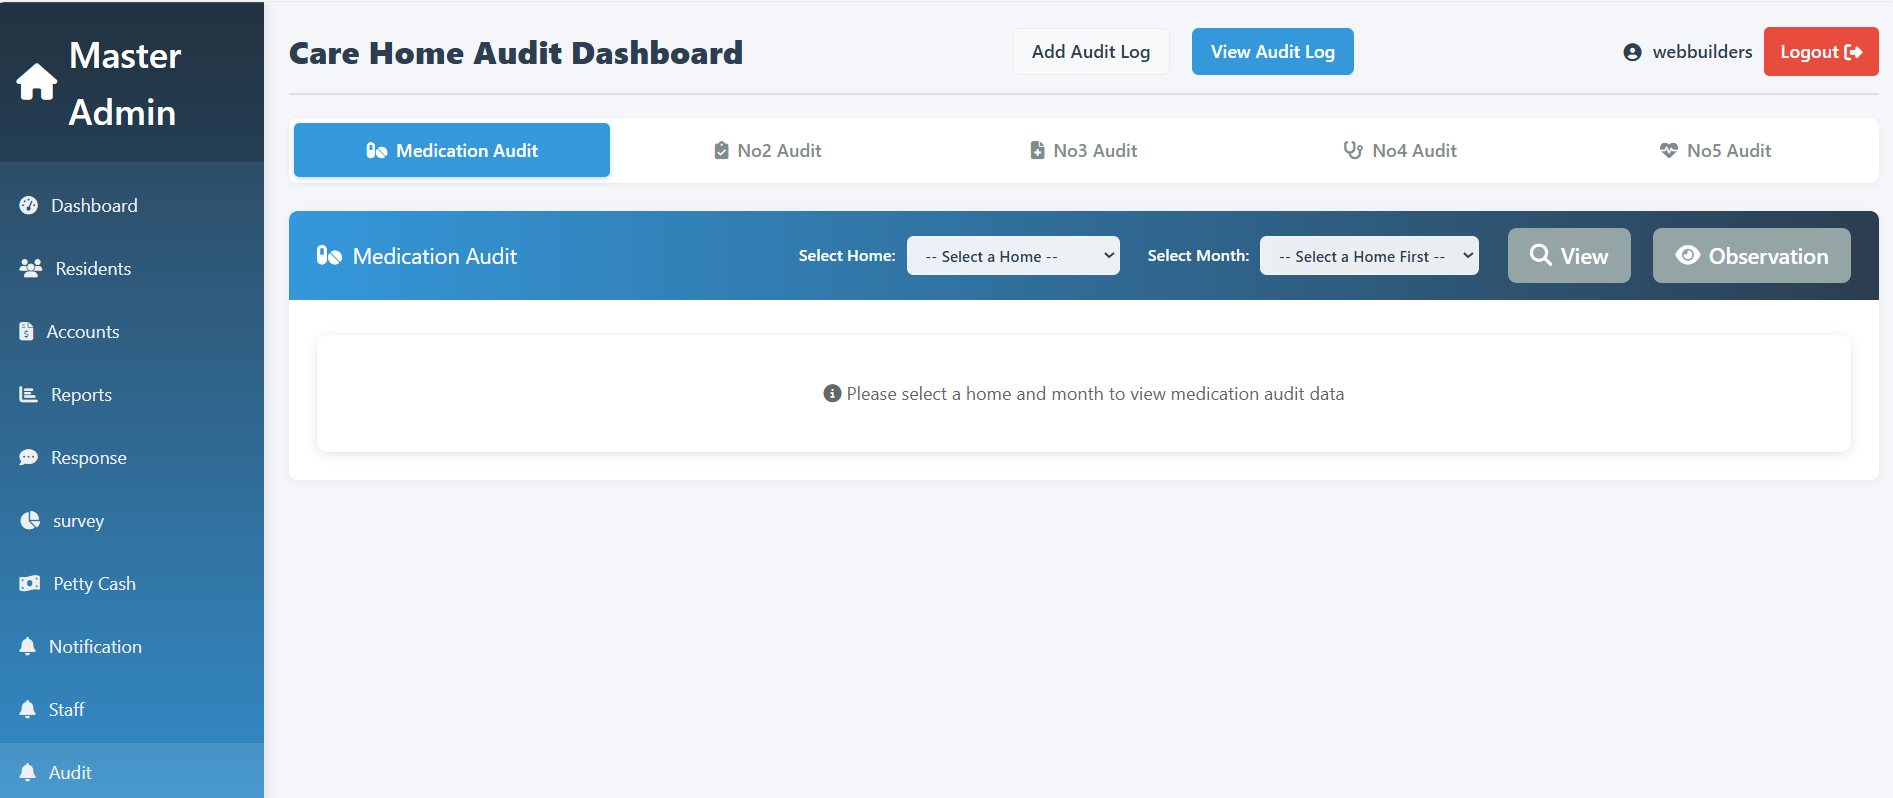
Click a button below to view details.
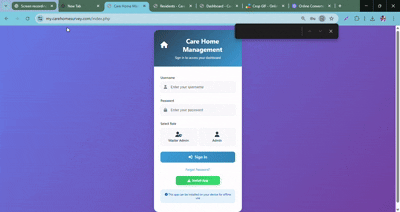
Login
- Enter your username
- Enter your password
- Select 'Admin' from the role dropdown
- Click 'Sign In' to access your dashboard
Click a button below to view details.
Follow these steps to login as Master Admin:
Step 1: 🔐 Log in
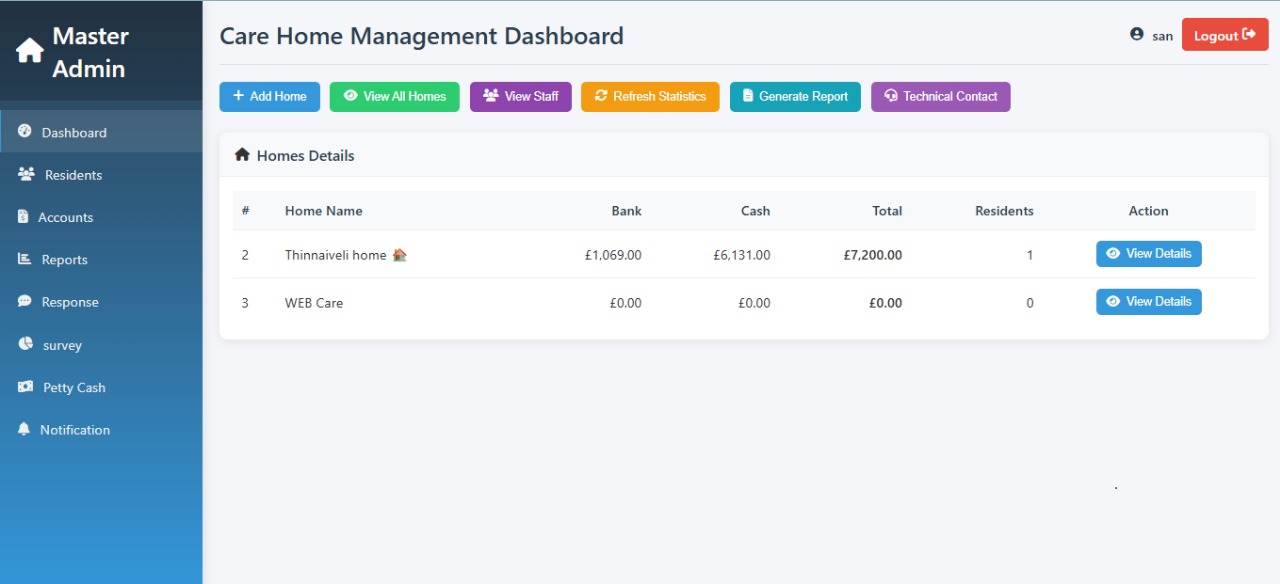
Log in to the Master Admin section and go to the Care Home Management Dashboard.
Step 2: 🏠 Select Care Home
From the Select Care Home dropdown, choose the correct home (e.g., WEB CARE).
Step 3: 📄 Generate Report
Click the Generate Report button.
The Care Homes Report pop-up will appear.
Step 4: ⚙️ Set Report Options
Step 5: 🖨️ Print or Save
Click the Print button to print or save as PDF.
Step 6: ❌ Close Report
Click the red Close button to return to the dashboard.
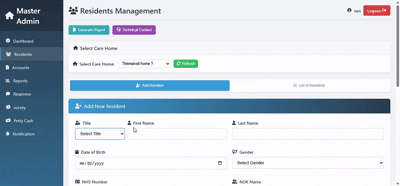
Step 1: 🔐 Access the Add Resident Form
Go to Residents Management → Add New Resident.
Step 2: 📝 Enter Personal Information
Step 3: 🆔 Enter Identification & Contact
Step 4: 💊 Enter Medical Information
Step 5: 🏥 Enter Admission Details
Step 6: 👪 Enter Next of Kin (NOK) Details
Step 7: 💾 Save or Reset
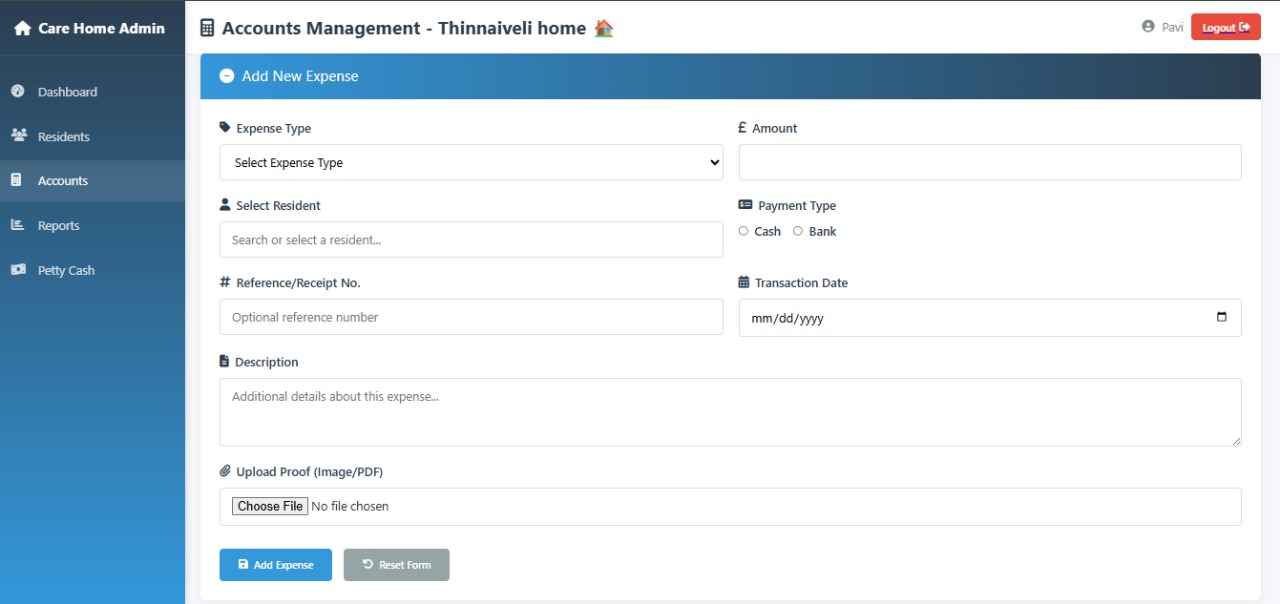
Best Practice Tip: Always select correct Category/Head for accurate reports.
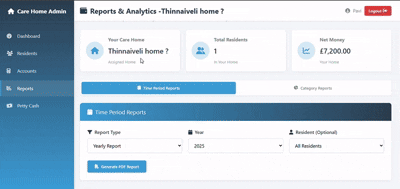
Purpose: Analyze financial performance over a specific timeframe.
Example: Yearly Report 2025 – Anchorage Care Home
Purpose: Focus on operational and combined data across homes, not just financial periods.
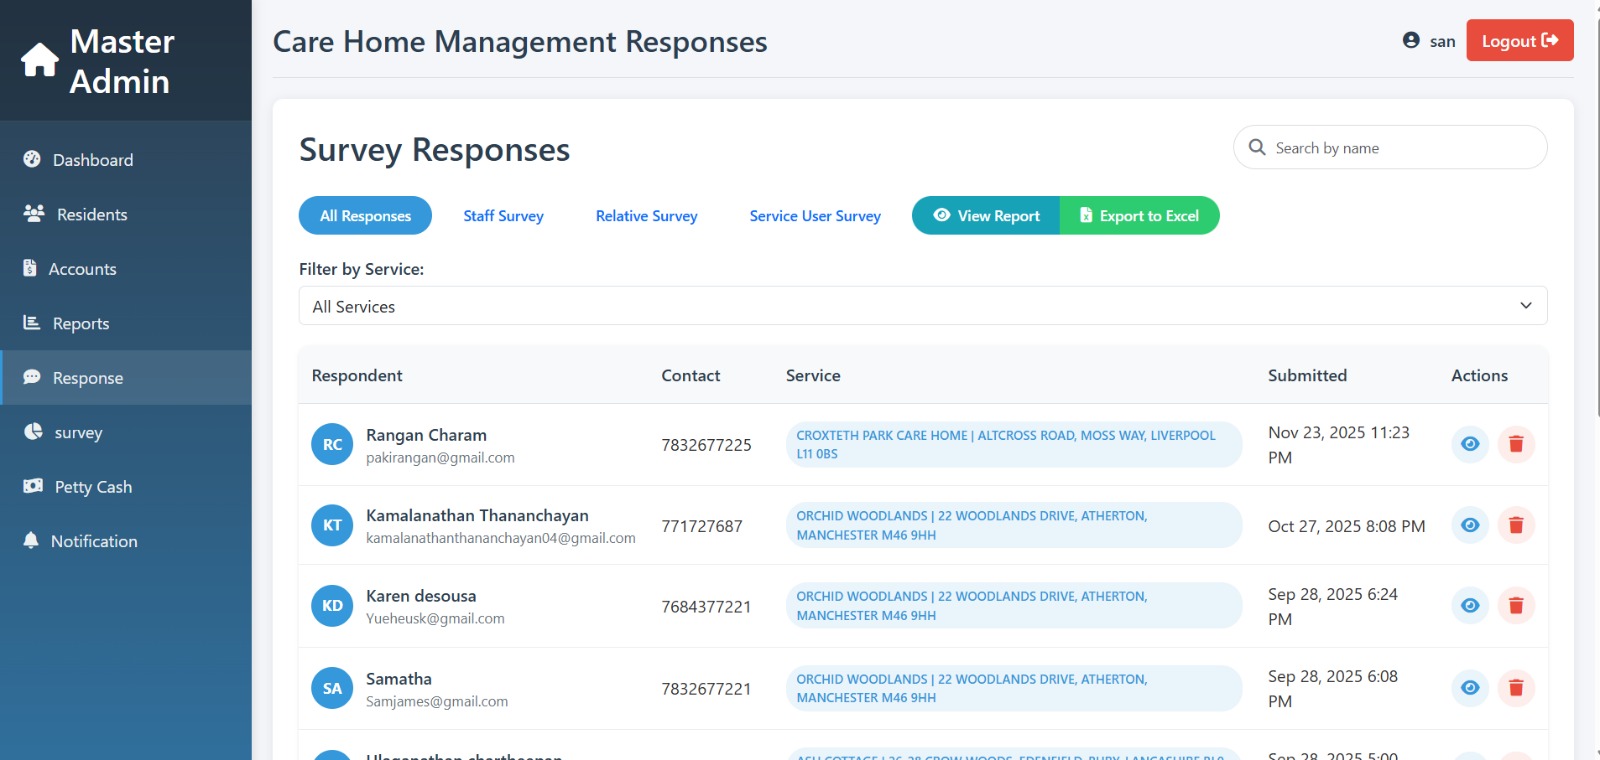
Manage user responses:
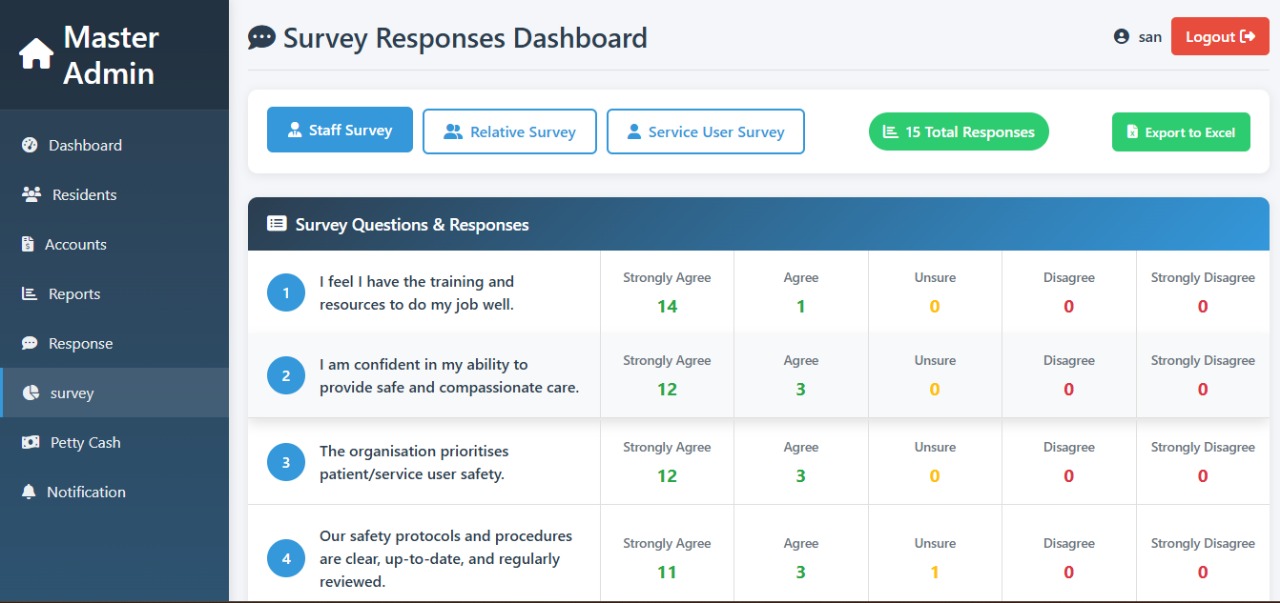
Survey workflow:
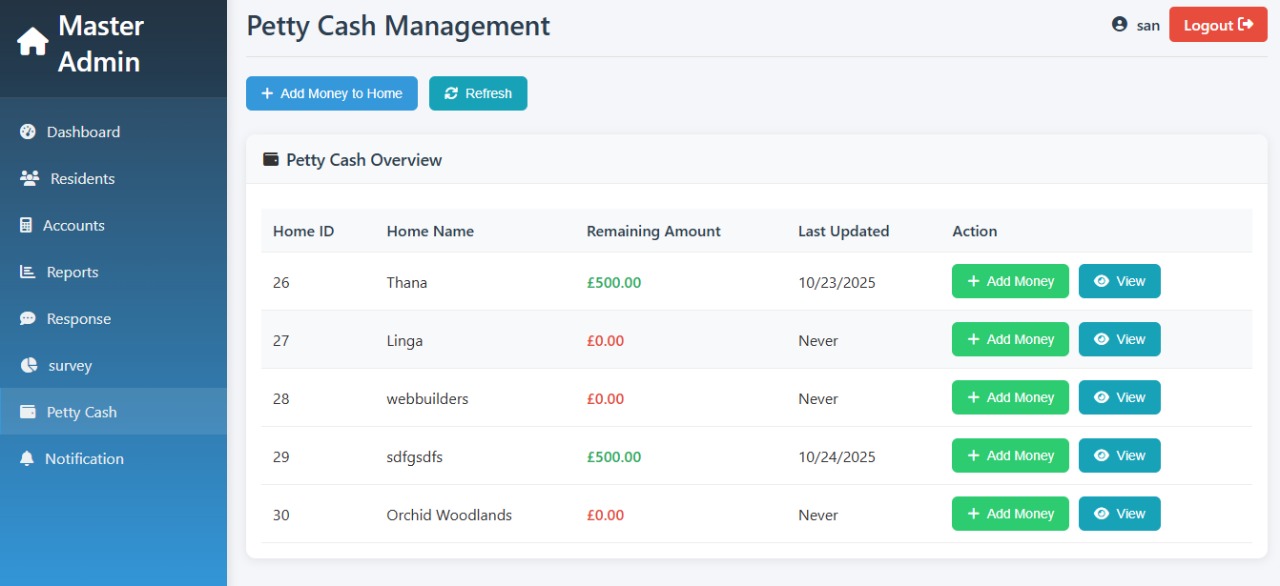
Manage petty cash balances for all care homes:
Adding money to petty cash is usually recorded as a Transfer or a specific Expense in the main Accounts Management system.
This reflects money moving from the main Bank Account to the Cash Account.
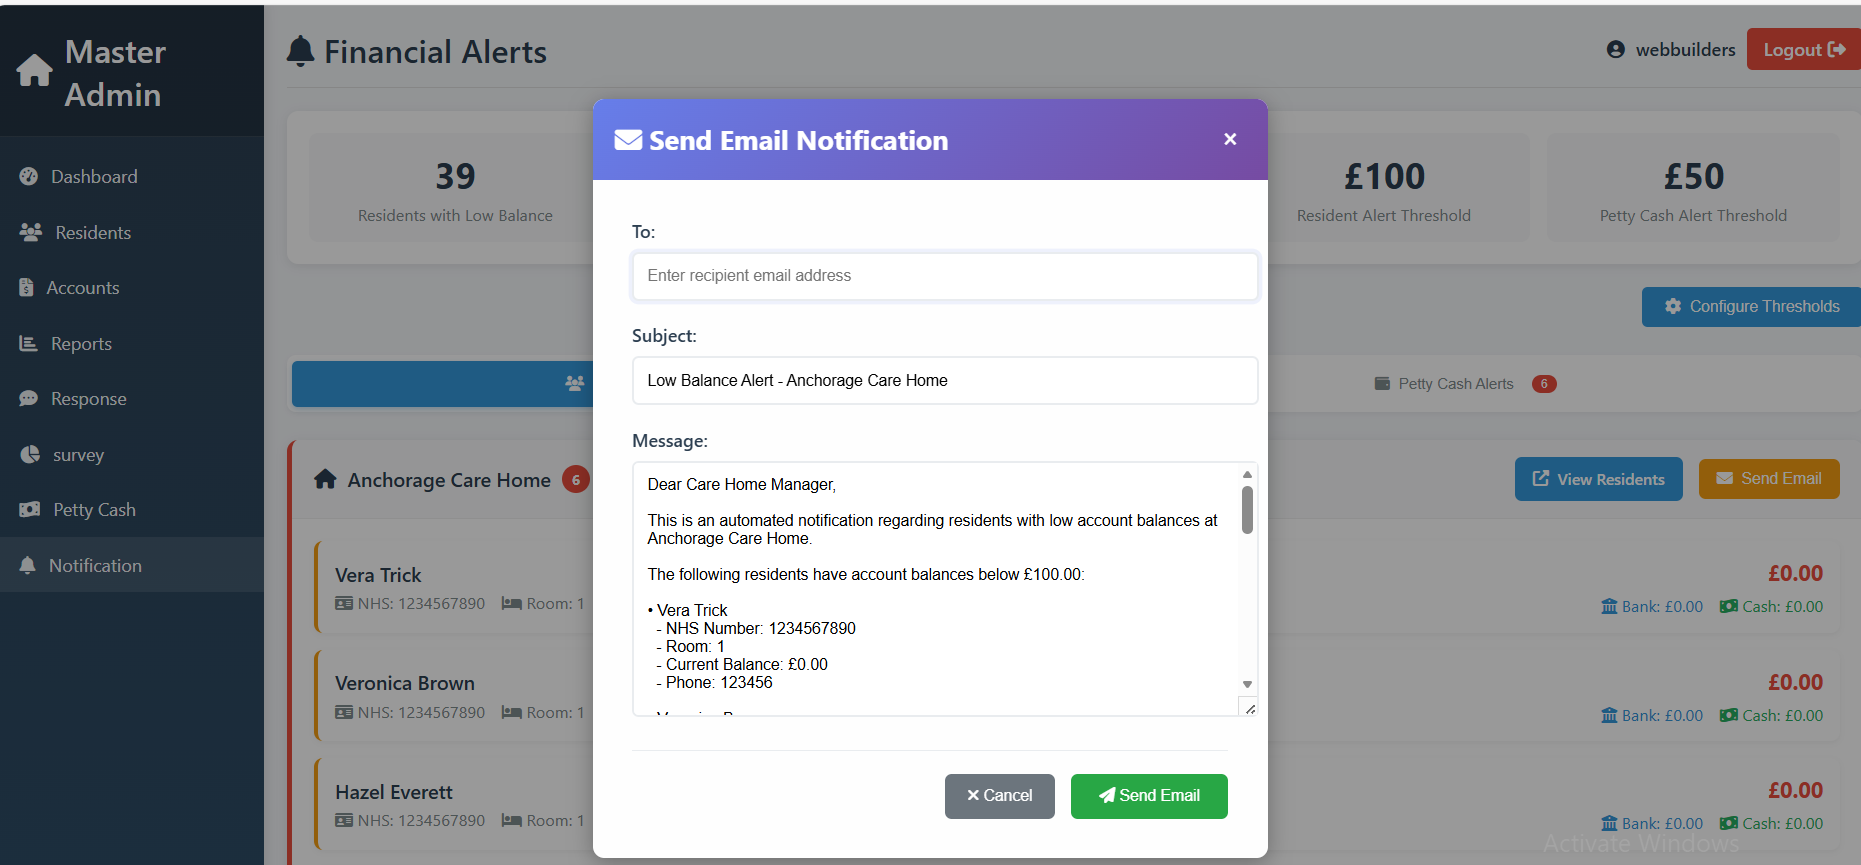
This system notifies you when key balances drop below pre-set thresholds to prevent cash flow issues and resident billing problems.
1. Access Organizations List
Go to Staff Management → Organizations. The table shows all registered organizations.
Note: If “No organizations found” appears, no records exist yet.
2. Organization Information Displayed
3. Searching for an Organization
Use the Search Bar at the top-right: “Search by name, phone or postcode”. Enter part of the name, phone, or postcode. The table will filter automatically.
Step-by-step checklist for adding a new starter:
Step 1 — Basic details
Open Staff Management → Add Employee. Fill Title, First Name, Middle Name (if any), Surname, Previous surname (if any), Date of Birth, Postcode/Town, Email, Mobile. Click Next.
Step 2 — Employment details
Click Next.
Step 3 — Banking details
Click Next.
Step 4 — Tax & NI
Click Next.
Step 5 — Documentation checklist
Go through each item (Passport/ID/Visa, P45, Driving Licence, Proof of Address, Contract Signed, CV, DBS, Application Form, References, Training proof, Medical check). Tick HAVE for items received. Use NOTES for comments. Click Next.
Step 6 — Finalise & Save
Review all information. Click Save or Create Employee. Optionally print/export summary.
1. Access Employee List
Staff Management → Employees. The table shows all current employees.
2. Employee Information Displayed
3. Actions: View and Manage
Part 1: View Annual Leave Summary
Staff Management → Annual Leave. Check employee summary for Working Hours, Total Holiday Entitlement, Holiday Taken by Month, Balance Available.
Part 2: Apply for Leave
Click Apply beside employee → pop-up shows employee name & Available Balance → Select Month, Enter Leave Hours, Reason → Submit Leave Request.
Part 3: View Archived Leave Data
Click View Archive → choose Fiscal Year → Review Working Hours, Total Holidays, Remaining Hours, Archived Date → Click View for full details → Close.
Part 4: Review Leave History
Open Leave History → Review Month, Hours, Reason, Applied Date → Click Edit/Delete for pending entries → Close.
1. Upload a New Document
Staff Management → Documents → Click green + Add Document → Select File → Enter Description → Click Upload/Save.